
To connect your custom domain to your site on BibleTalk.church, follow the steps below. This allows visitors to access your church website using your own domain name (like mychurch.org).
Log in to your site’s admin area and navigate to the Settings section.

Click on the Domains tab in the mini navigation at the top.

In the Add Domain form, enter your domain — just the base part (e.g., yourchurch.org). Don’t include http:// or www.
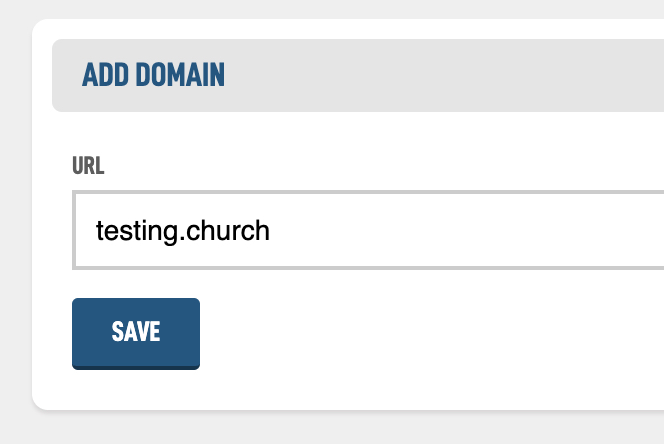
Hit Save. This lets our system know which domain you plan to connect. Your current website will not be affected yet. When you're ready to move your site to BibleTalk.church, continue to Step 2.
Log in to the service that manages your domain’s DNS (GoDaddy, Namecheap, Squarespace Domains, etc.). This is often your domain registrar, but it may be a separate service such as Cloudflare.
Look for the DNS settings or DNS management section for your domain.
Only change the website records described below. Do not remove MX, TXT, DKIM, SPF, or other email-related DNS records. Changing those records may interrupt your church’s email service.
You need to point your domain’s A record to our server IP:
@134.209.119.42You should also point the www version of your domain to our server:
www134.209.119.42If an A record for @ already exists and points somewhere else, edit it to use 134.209.119.42 rather than adding a second one. If a www record already exists (often as a CNAME), replace it with the www record shown above.
@ A record already exists, edit it rather than adding another one.www already points to another website, replace that record with the one above.If your domain uses Cloudflare for DNS, make sure the Proxy status for the @ and www records is set to DNS only (gray cloud), not Proxied (orange cloud).
You can click the orange cloud icon in Cloudflare to change it to gray. This allows BibleTalk.church to verify that your domain is pointing to the correct server.
Once you've saved these DNS changes, return to BibleTalk.church to verify the connection.
After updating your DNS records, return to the Domains section in BibleTalk.church and click Check DNS.
Note: If you just updated your DNS, verification may not work immediately. DNS changes can take time to propagate.

When the DNS is verified it will turn to this:
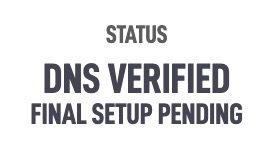
Once your domain shows DNS Verified — Final Setup Pending, no further action is needed from you. We'll take care of the remaining setup:
Once the remaining setup is complete, your domain status will change to Complete.

