On your site, Events are like containers — they group together related occurrences. Inside each Event, you can add one or more Event Dates, which are the actual scheduled instances.
For example, you might create an Event called "Funerals". This is your general category.
Then, for each individual funeral, you would add a new Event Date:
The title for the Event Date could be "Funeral for Joe Smith"
You can also add specific details (location, time, description, etc.) just for that date.
This setup keeps your Events organized while giving you the flexibility to customize each occurrence.
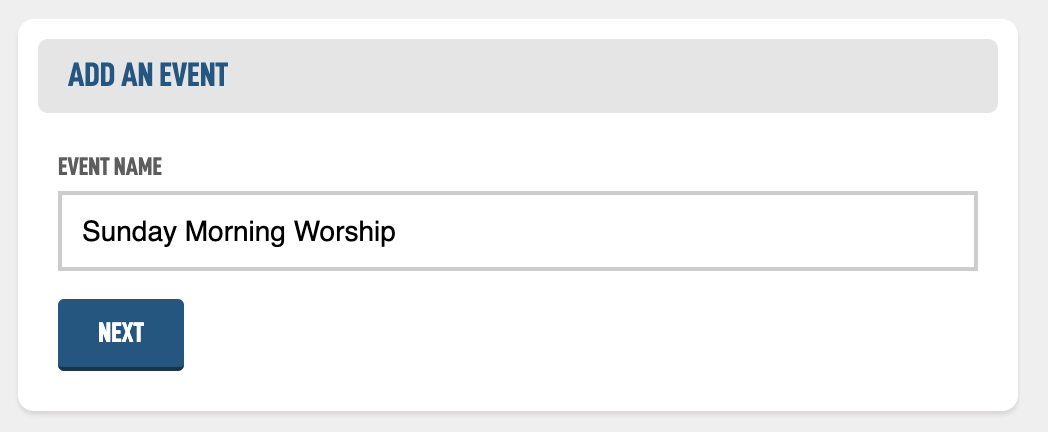
In the Events module, tap the Add Event button in the top left corner.

Add an Event Name and hit Next. It will create the event and send you to the Edit screen, which is the same screen if you go back to edit any event.
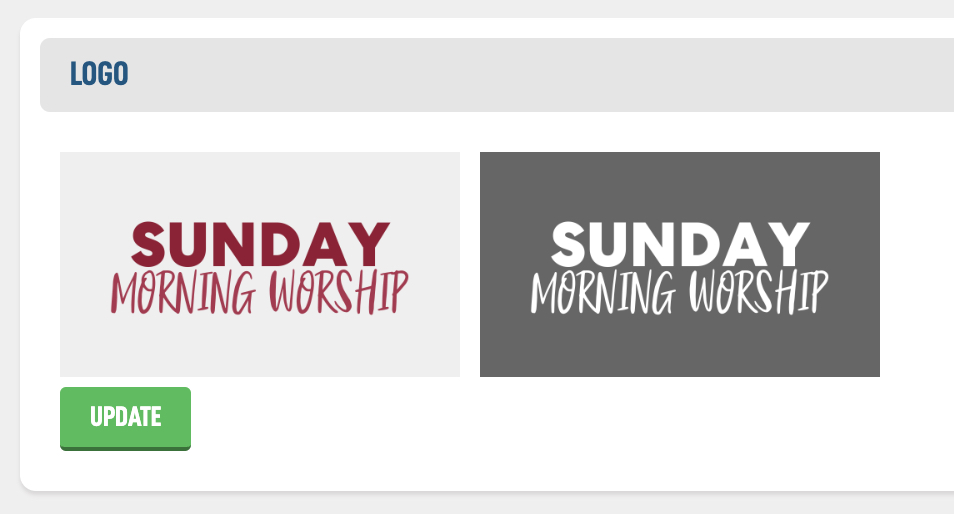
The first thing you will want to do is create a logo for the event. There is another Creating a Logo Help Guide, that you should check out on how to make some in our system. You should make the logo Transparent (meaning it has no background) if you want create nice posters and graphics later on.
After you have a logo, you can see both version of your logo, the color and the white. I'll show you later in this guide why this is helpful.
We'll next jump to the Details box. The Slug is the friendly name for the public facing website and you probably don't have to change it. The Details box should include any specifics about the event.
The Default Announcement Script Text is the reusable text that will be added to an Announcement slide in the Announcements module when you are create a new slide for a date of this event.
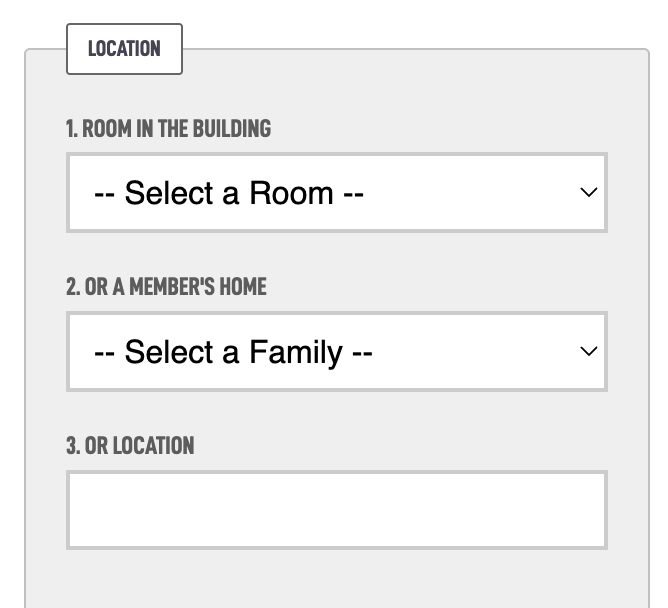
In the Location box, you have up to three options:
Room in the building (Adding Room Help Guide)
Member’s home
Custom Location
These are prioritized in the order listed above. That means:
If you select a Room in your building, that will be the location shown.
If you also select a Member’s home, it won’t display — because the system already has a location from the higher-priority option.
Only the first selected option (in the order above) is used.
Tip:
If the location varies for each Event Date, it’s best to leave the main Event location empty. Instead, set the location individually for each Event Date.
Example:
If you're creating an Event for Youth Group Area-Wides (and they happen at different churches), leave the main Event location blank. Then, on Event Date #3, you could set the location as “Southside Church of Christ, 123 Main St.”
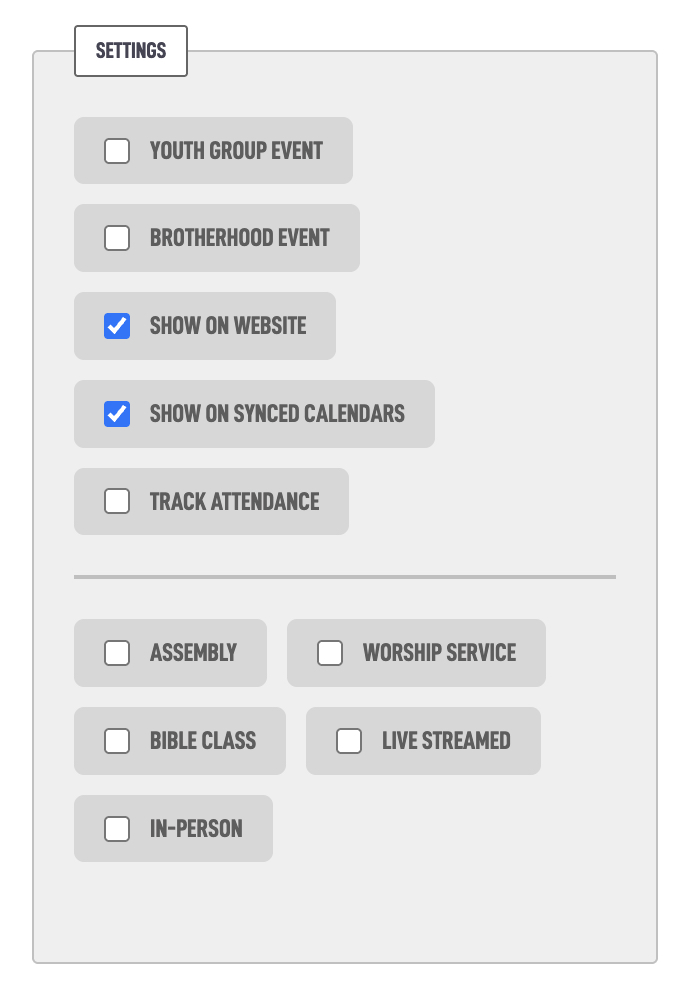
Each event has several settings you can toggle to control how it behaves and who sees it. Here’s what each option does:
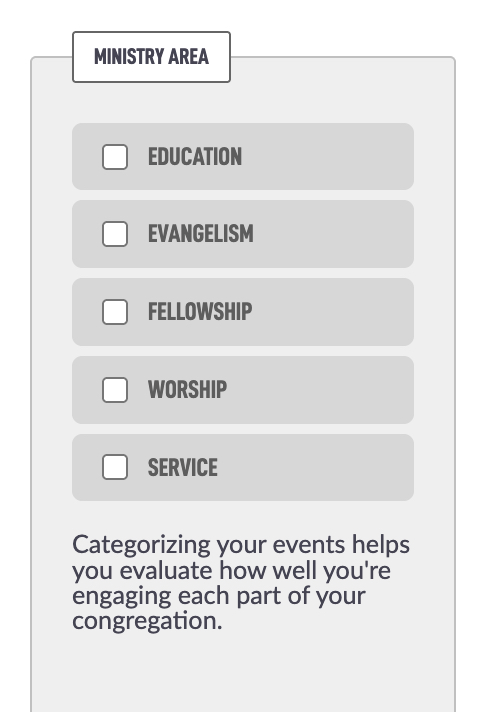
The next section is Ministry Areas. Checking the ministry areas gives you a better idea if all of your plates are spinning. After you start to get some events, you can see the breakdown on the main Events module page.

One thing to note is that you may not want to select Worship for all your worship services and Education for your Bible classes because there are a lot more of those events and your numbers will get very skewed.
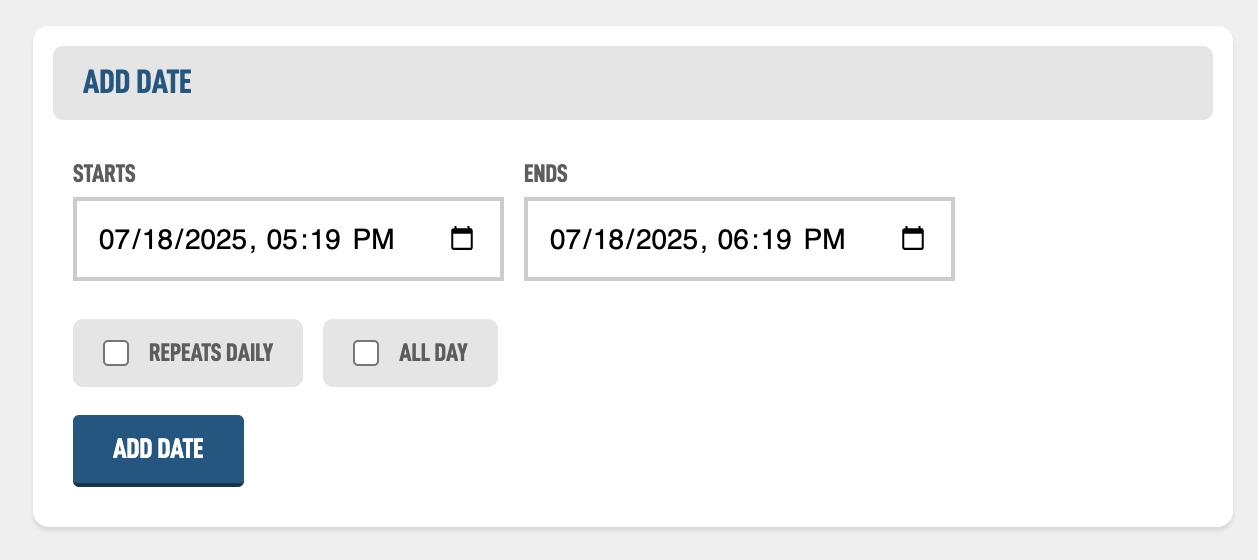
Below all the settings boxes is an Add Date box. This is where you add the dates that your event takes place. The start and end date should be pretty straight forward.
The All Day option just stops the time from being displayed.
The Repeats Daily option allows you to set if this event happens daily from the start date to the end date. Let's say you have a VBS and it's from Sunday to Wednesday at 6:30pm to 8:30pm each day. If you wanted you could add each of those days as separate event days but the repeats daily will automatically put those on each day:
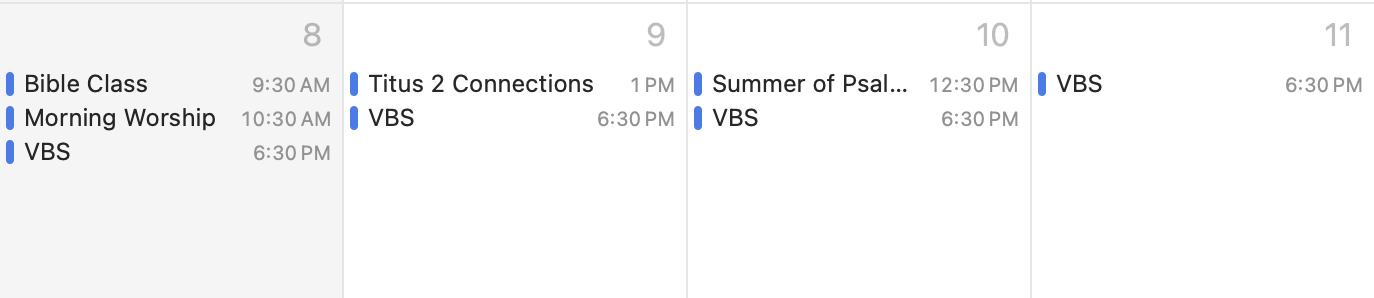
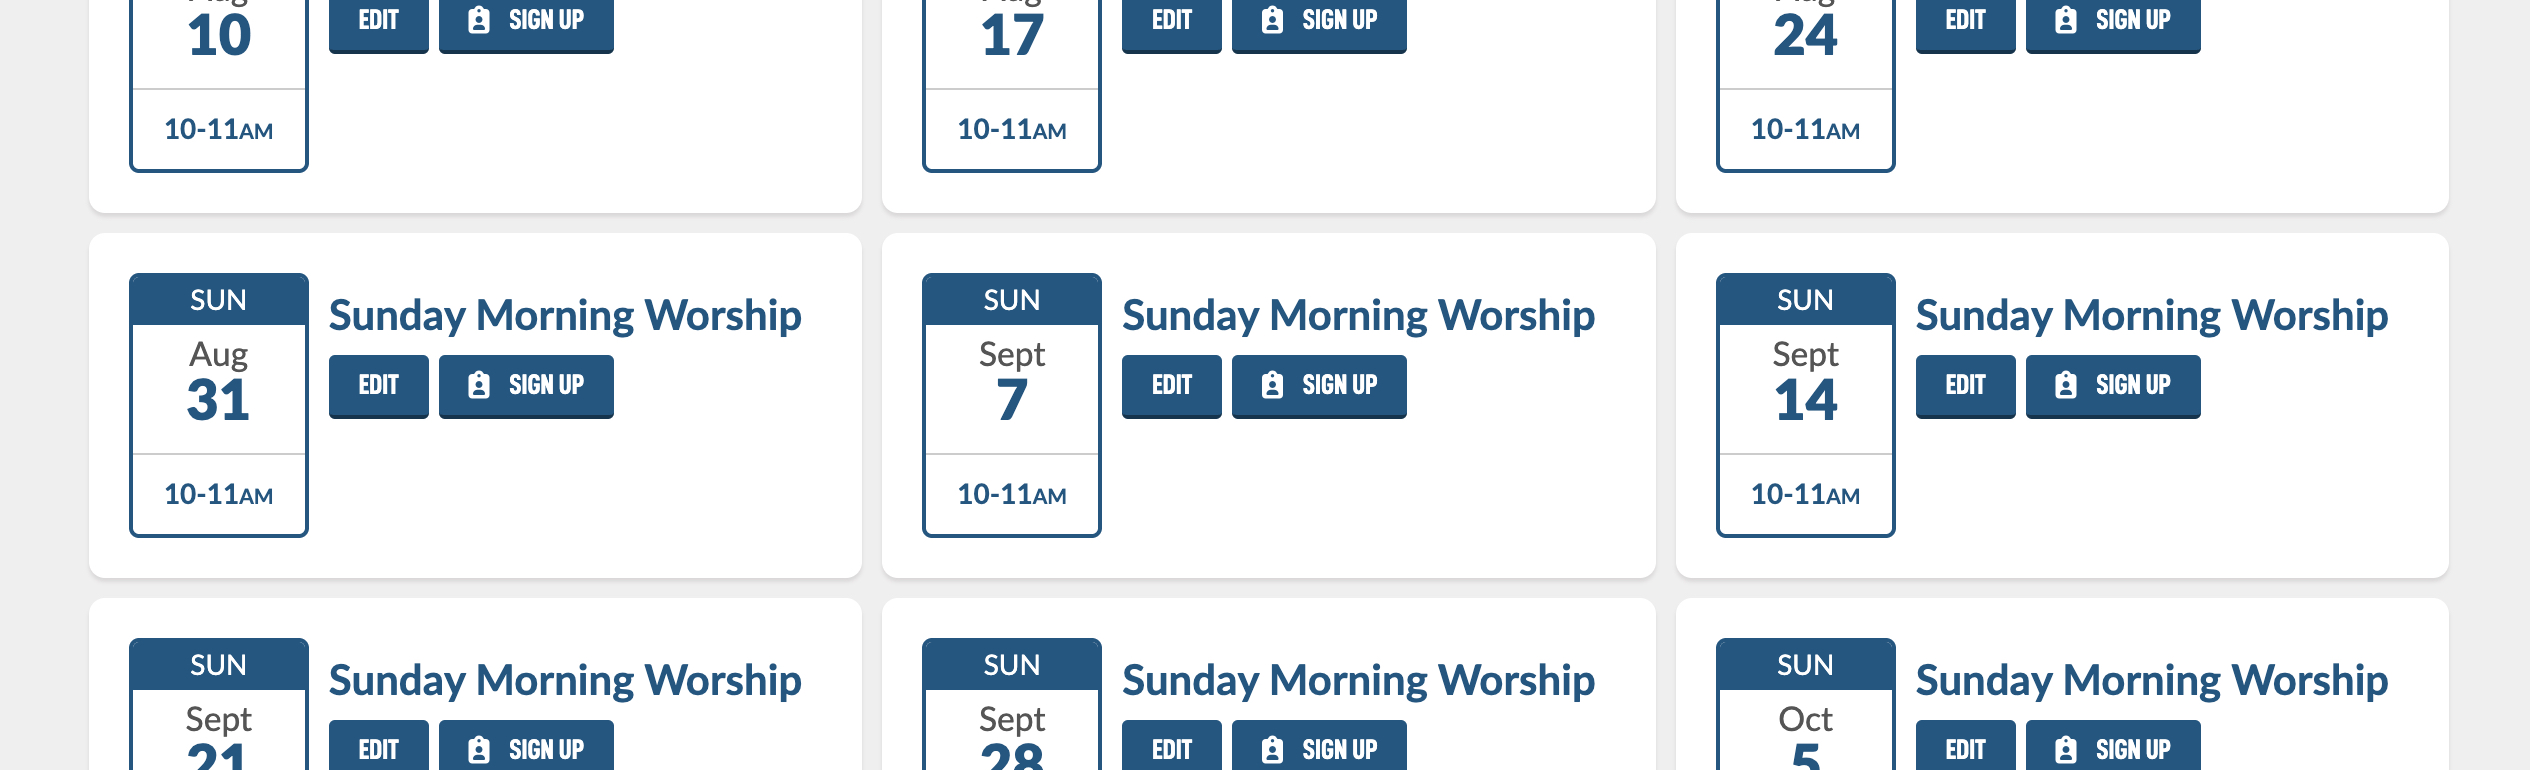
It will also group your dates in event box display:
Let's add a worship service.
After you hit Add Date, a new box will appear below the Add Date box with your Upcoming Dates.
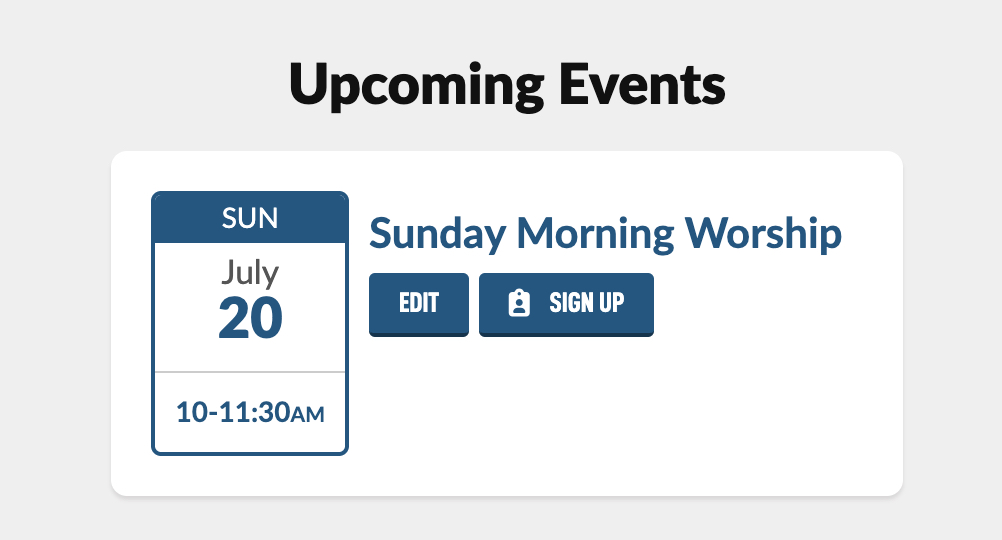
You can then add other dates. One tip is that if you have the Track Attendance checkbox checked you will see a +7 Days button on your last event date. This allows you to quickly add your Bible classes and Worship Services. We add a whole years worth of services at a time.
You might be wondering why there isn’t a simple “Repeats Weekly” option. The reason is tied to how attendance tracking works.
When you enable attendance for an event, the system needs to store and report data for each specific day. To do that, it creates a separate entry in the database for every Event Date — and this is what allows us to:
Let members check in to a specific session
Generate accurate attendance reports
Assign serving roles to individual dates
While it may take a few extra clicks, this structure ensures everything is organized and reportable — especially for recurring events like Bible classes, youth meetings, or worship services.
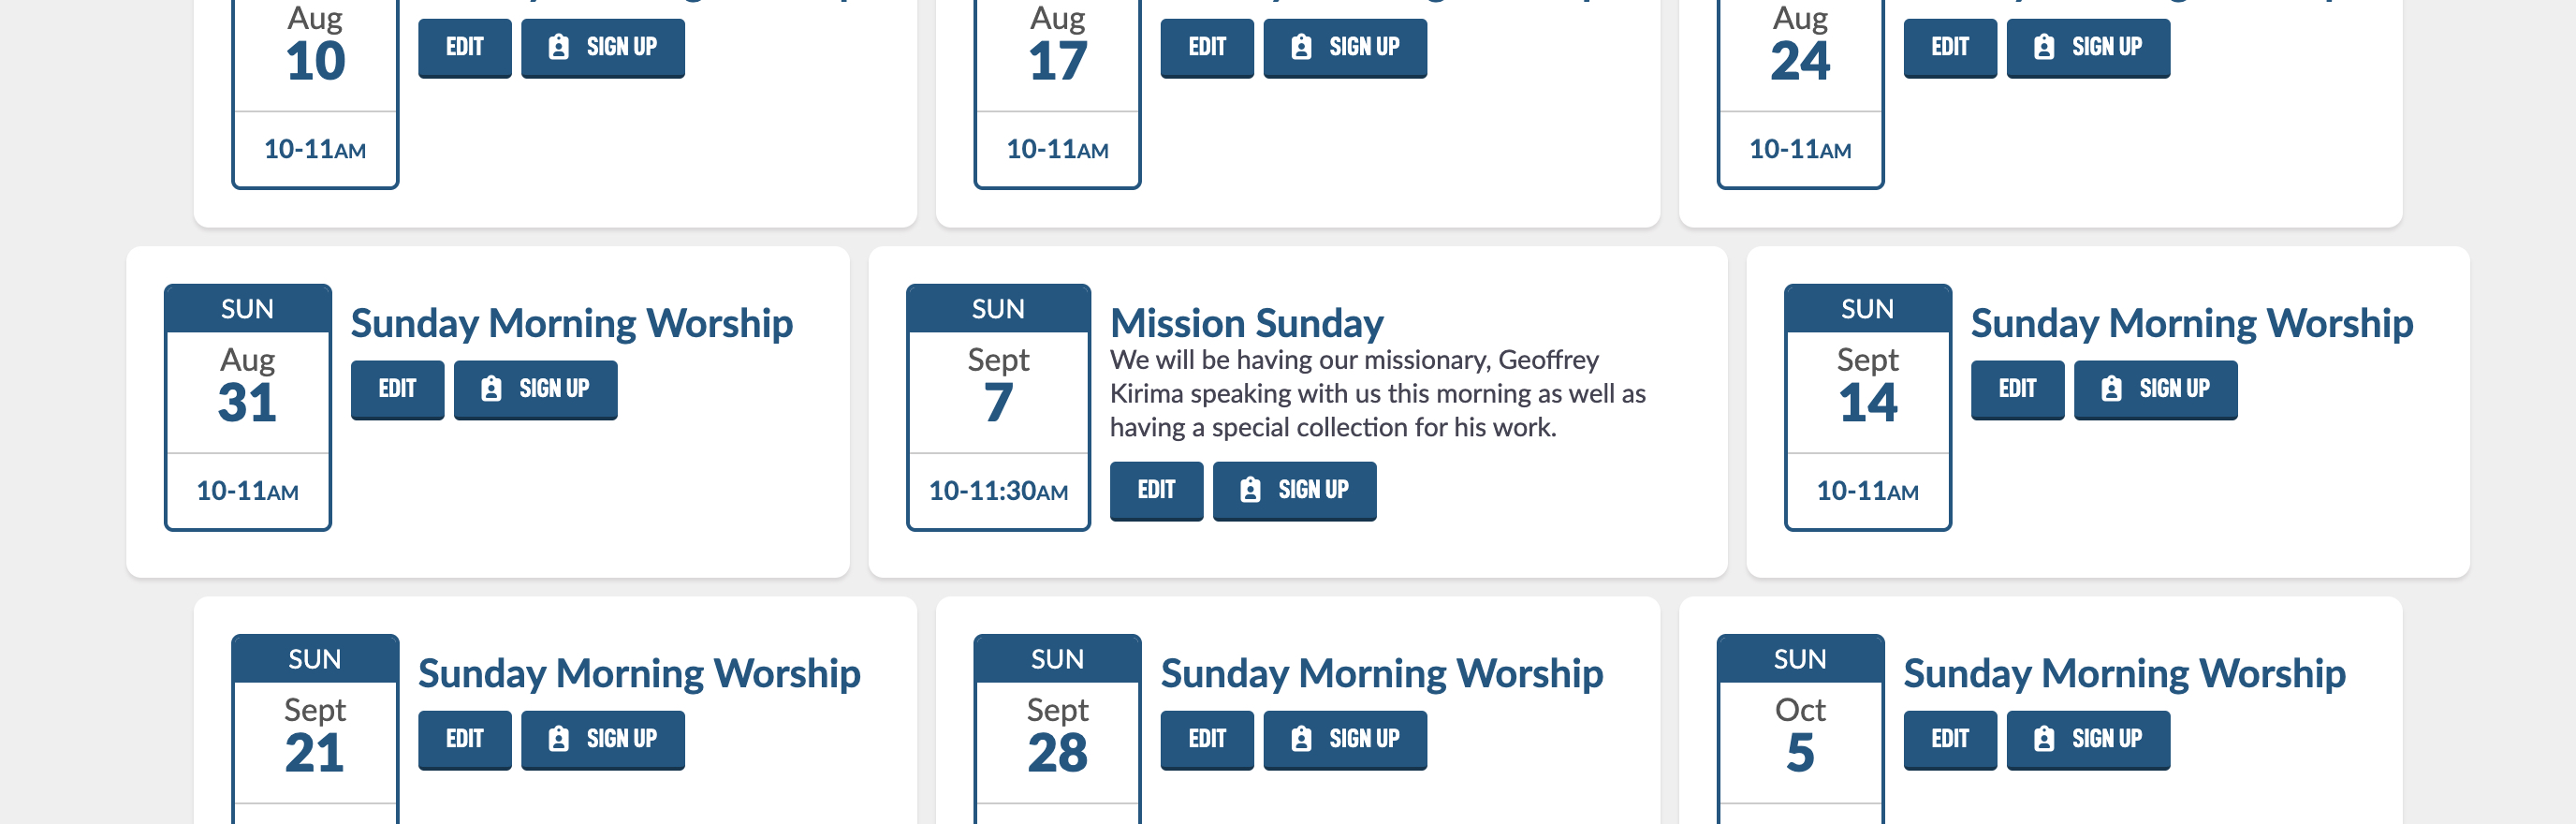
In your list of event dates, click on Edit for one of your events. In this example let's say one of our Sunday Morning Worship services is actually Mission Sunday. Let's see one way we could do that. Let's edit the Sunday Sept. 7th event date but tapping on the event name, edit button or date box.
Here is the overview of the Edit Event date, let's go over some of the elements.
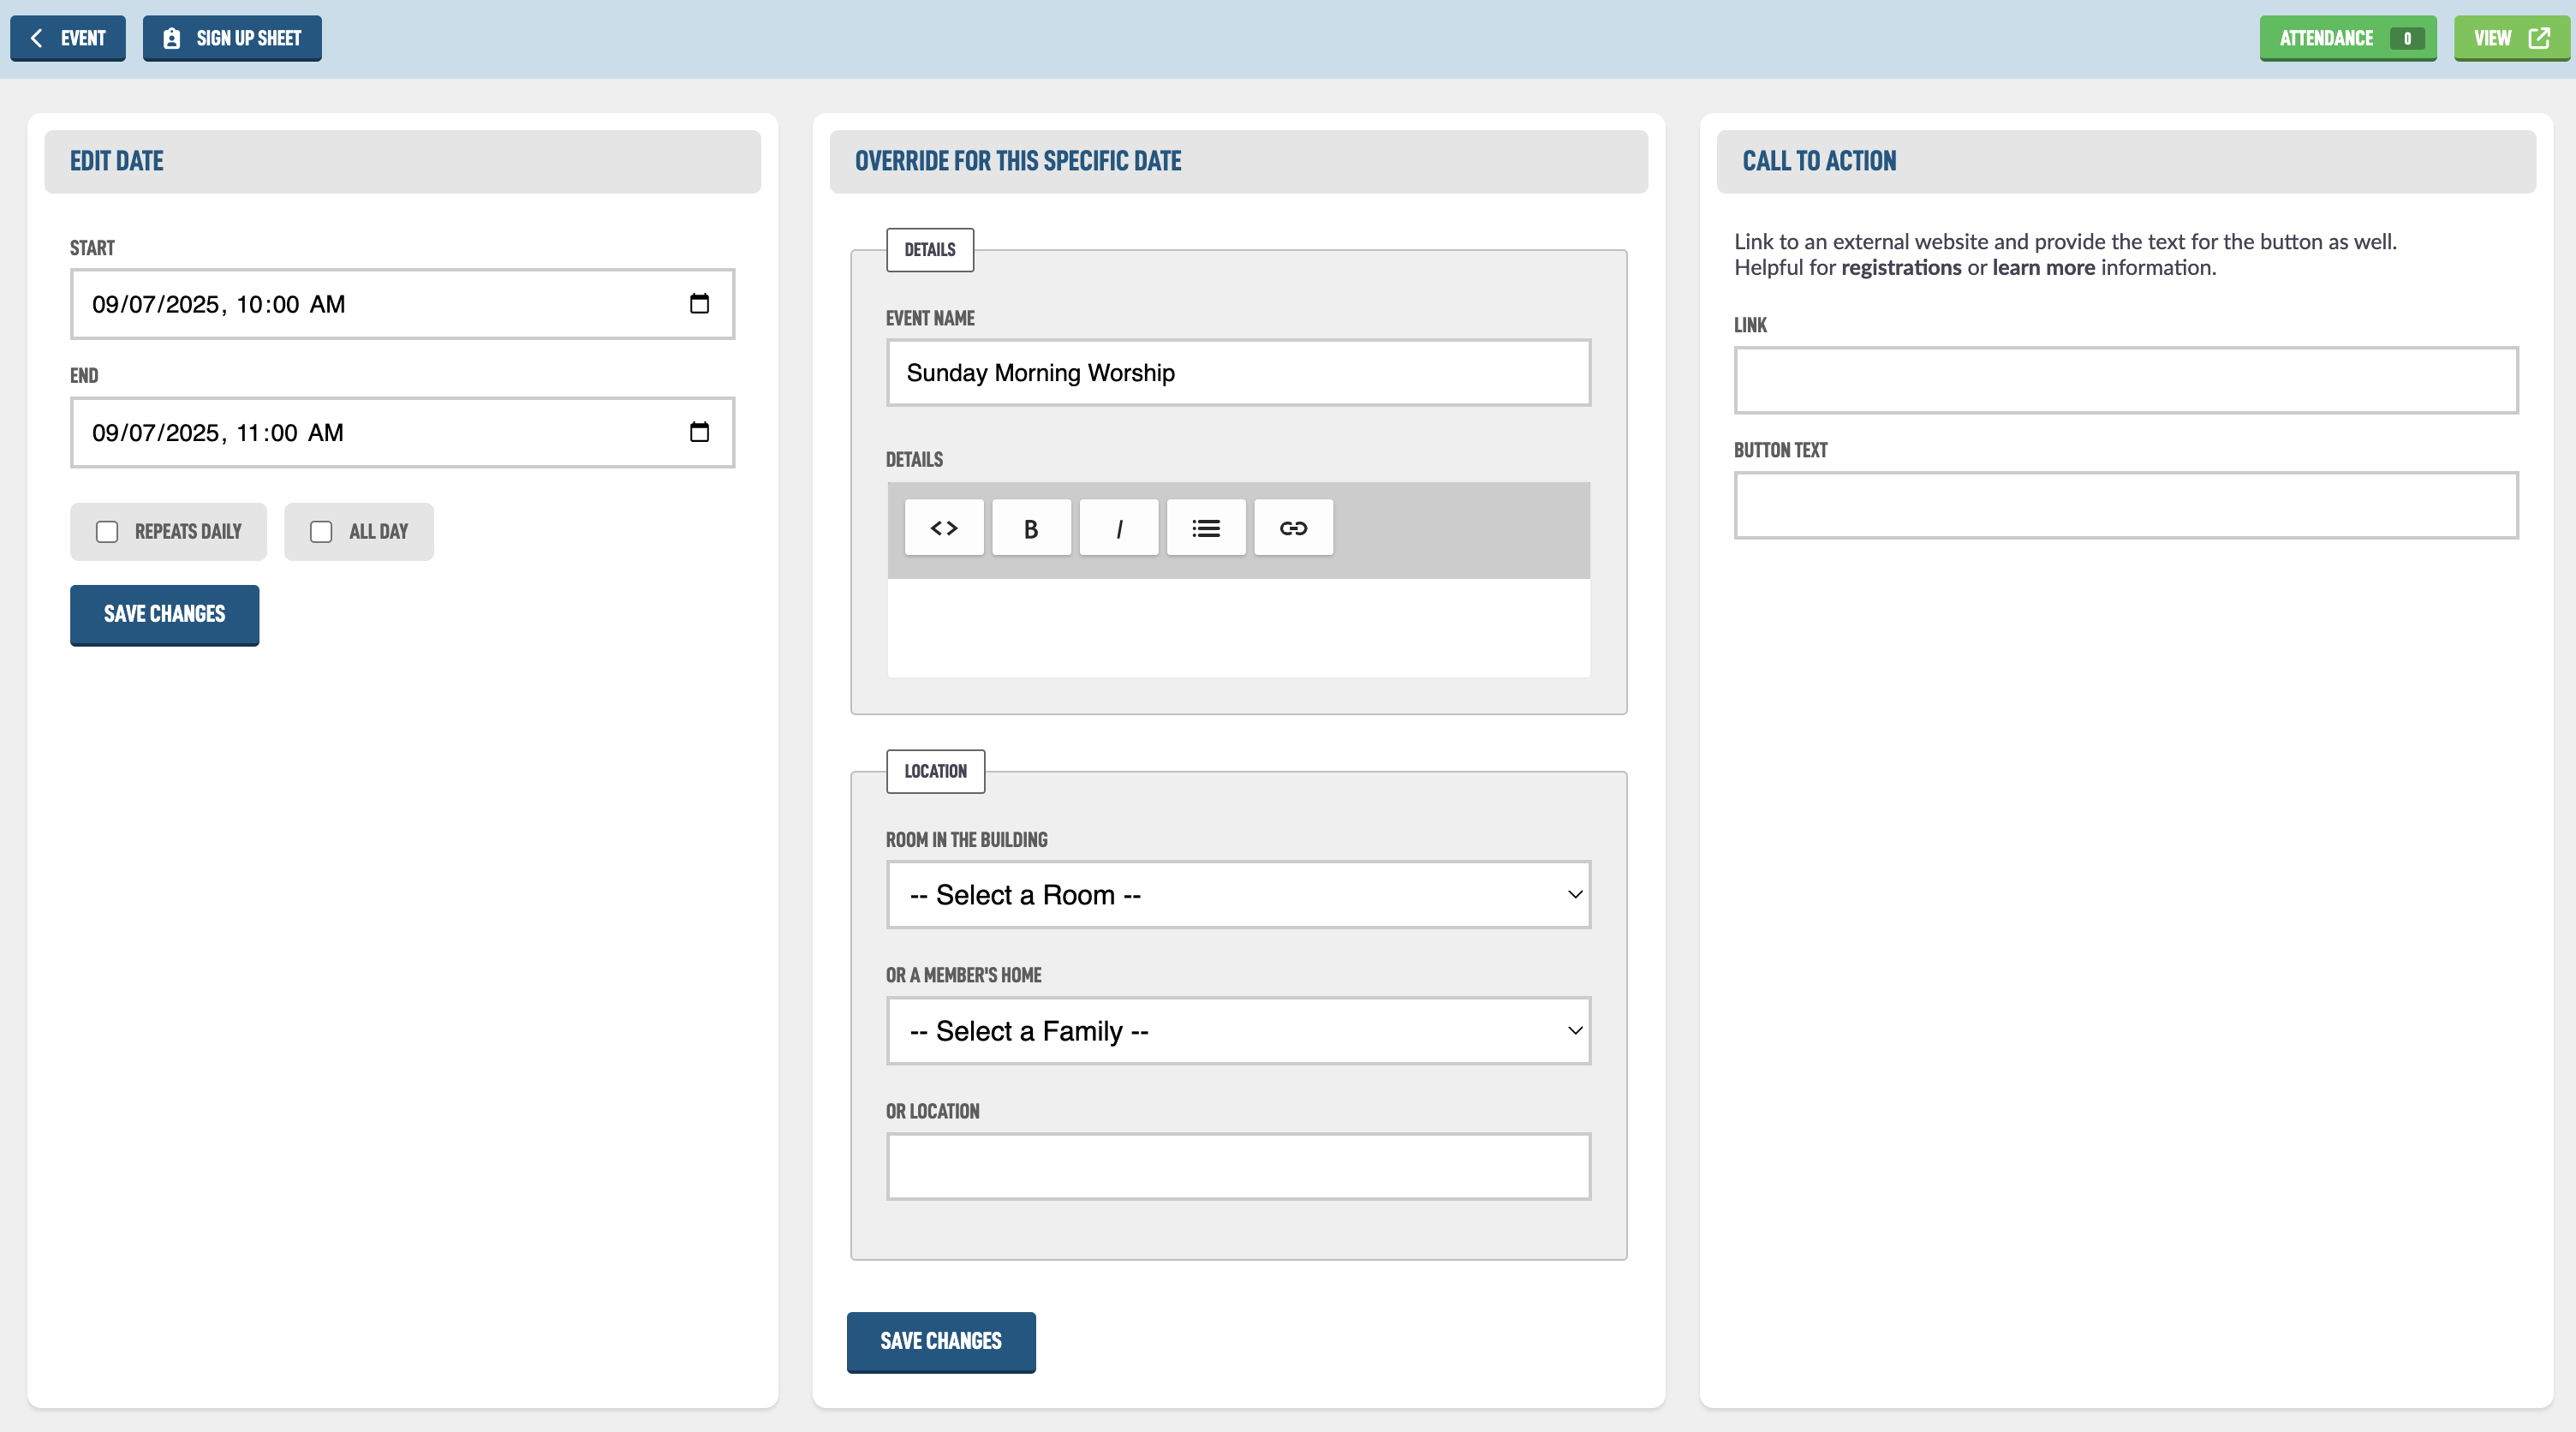
In the Edit Date box you could change the hours for just the date, maybe the Mission Sunday goes a little longer. In the Override for this Specific Date box, you can change the settings for just this event date. Let's make the Name Mission Sunday and add some custom details to just this date.
We'll go ahead and select that it will take place in the Auditorum and add a Call to Action that links to his website so people can learn more about him and hit Save Changes.
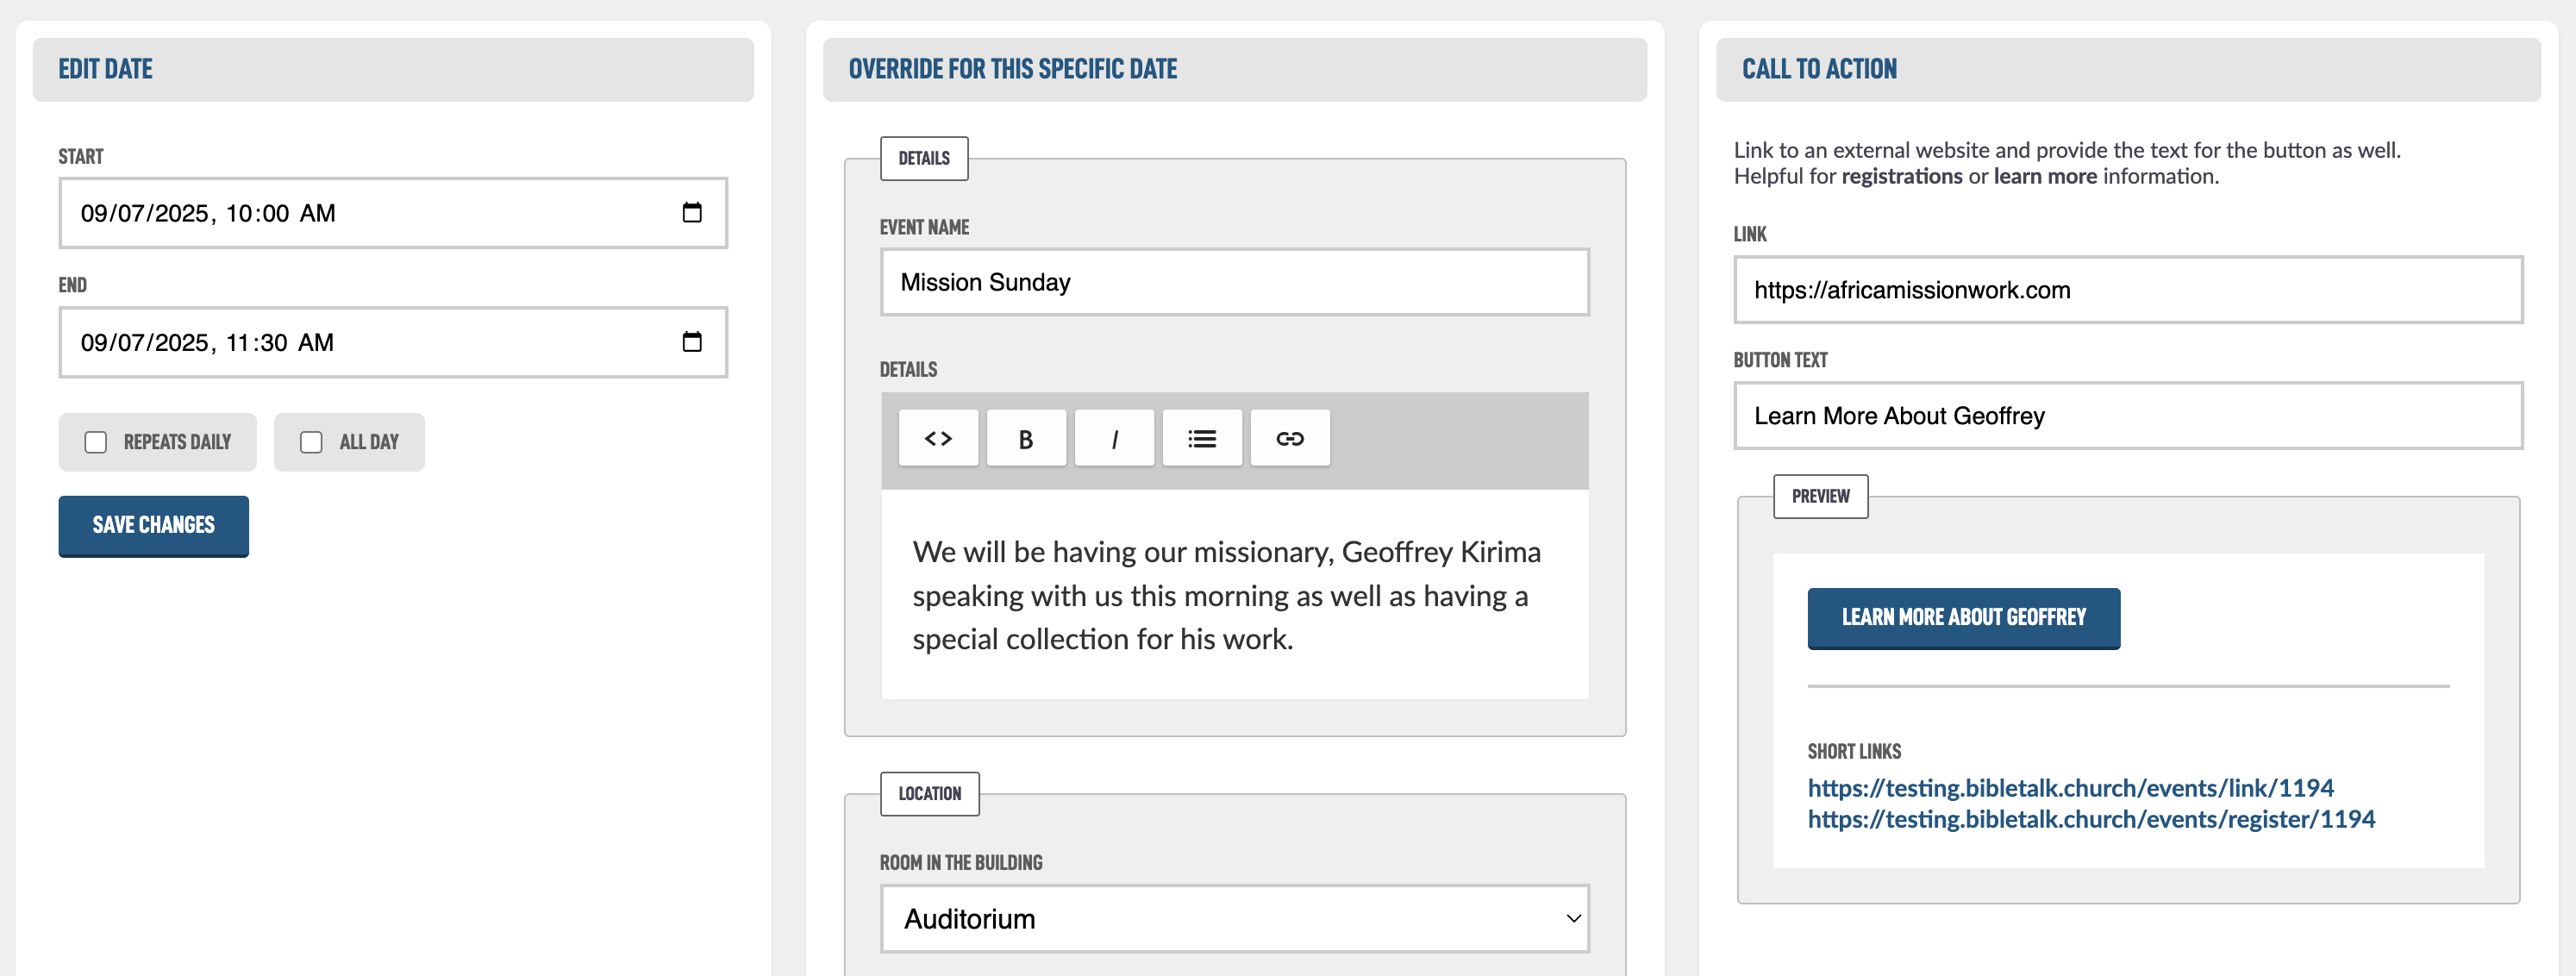
The Call to Action option lets you create a friendly, shareable link that points to your site — but redirects to another URL.
This is especially useful when you're hosting an event at your building, but using an external system (like Eventbrite or a registration/payment platform) to manage signups or collect payments.
Instead of sharing a long, complicated external URL, you can create a clean link and when someone clicks it, they'll be automatically redirected to the external registration page.
It’s a simple way to keep things branded and professional, while still using the tools that work best for your event.
If we go back to the Edit Event screen, we can see the event date has been update and looks different: